
Hi, and welcome to a basic overview of how to grow marijuana. In this article, you will learn a simple, step-by-step process, on how to grow quality marijuana.
My goal here is that everyone who takes the time to read this, will walk away with enough knowledge, and confidence to grow their own marijuana plant. Because after all, there’s nothing like homegrown! Here’s what you will need:
Indoor Grow Set Up Check List
- Lights (1 for the vegetative stage and 1 for the bloom stage)
- Pots 5-10 gallons (depending on the size of your growing area)
- Soil (I prefer an organic mix such as G&B)
- Mycorrhizae (this is a powdered fungus that is like a superfood for roots)
- Nutrients (again I like G&B veg and G&B bloom)
- Un-sulfured blackstrap molasses
- Oscillating fan
- Measuring spoons
- Preventative pest spray (I use lost coast plant therapy)
- Sprayer for pest control
- Timers
- Ph meter (up to you)
- Ph up and ph down solution. (Vinegar will bring the ph down while baking soda will bring it up if you’re on a budget)
- Optional items:
- 2 ventilation fans. (One to bring fresh air in, one to bring stale air out)
- dehumidifier
- A/C if you live in a hot area. (I get by without one)
- You can get by without these items but I recommend adding them at some point.
Step 1: Pick a grow area.
Don’t underestimate the importance of this step. You’ll want to pick an area that allows for proper ventilation, and a place that is least likely to give you problems with unwanted pests.
Step 2: Get supplies.
 grow supplies in a box
This part is fun, yet can be a little intimidating, due to the cost. Try to remember though, that this is an investment that will pay for itself in no time, and is a rewarding experience in itself.
Step 3: Get some plants.
At this point, you need to decide whether you’re starting with seed or clones. Both have their advantages and disadvantages. Plants grown from seedlings tend to be stronger and more disease resistant but take longer to develop.
Also, when you grow from seed, you don’t know male from female until you reach the bloom stage. Which means you may lose half of your plants. On the other hand, clones are great because you know exactly what you have. 4 plants equals 4 females. However, this does not come without risk.
More often than not, when a garden becomes infested with unwanted pests (mites), there’s a good chance it came from someone else’s garden, and that usually means through clones. There’s nothing wrong with using clones, I have used them myself, but I can tell you from experience, that losing a crop to mites will all but make you give up on growing.
If you do decide on clones, I would recommend isolating them for a week before you bring them into your grow area, spraying them down daily, with a preventative such as lost coast plant therapy. If you do go with seeds, just soak them in water for 12-24 hours before planting them directly in the soil.
Note: You will want to keep an oscillating fan on the plants to keep fresh air moving around at all times.
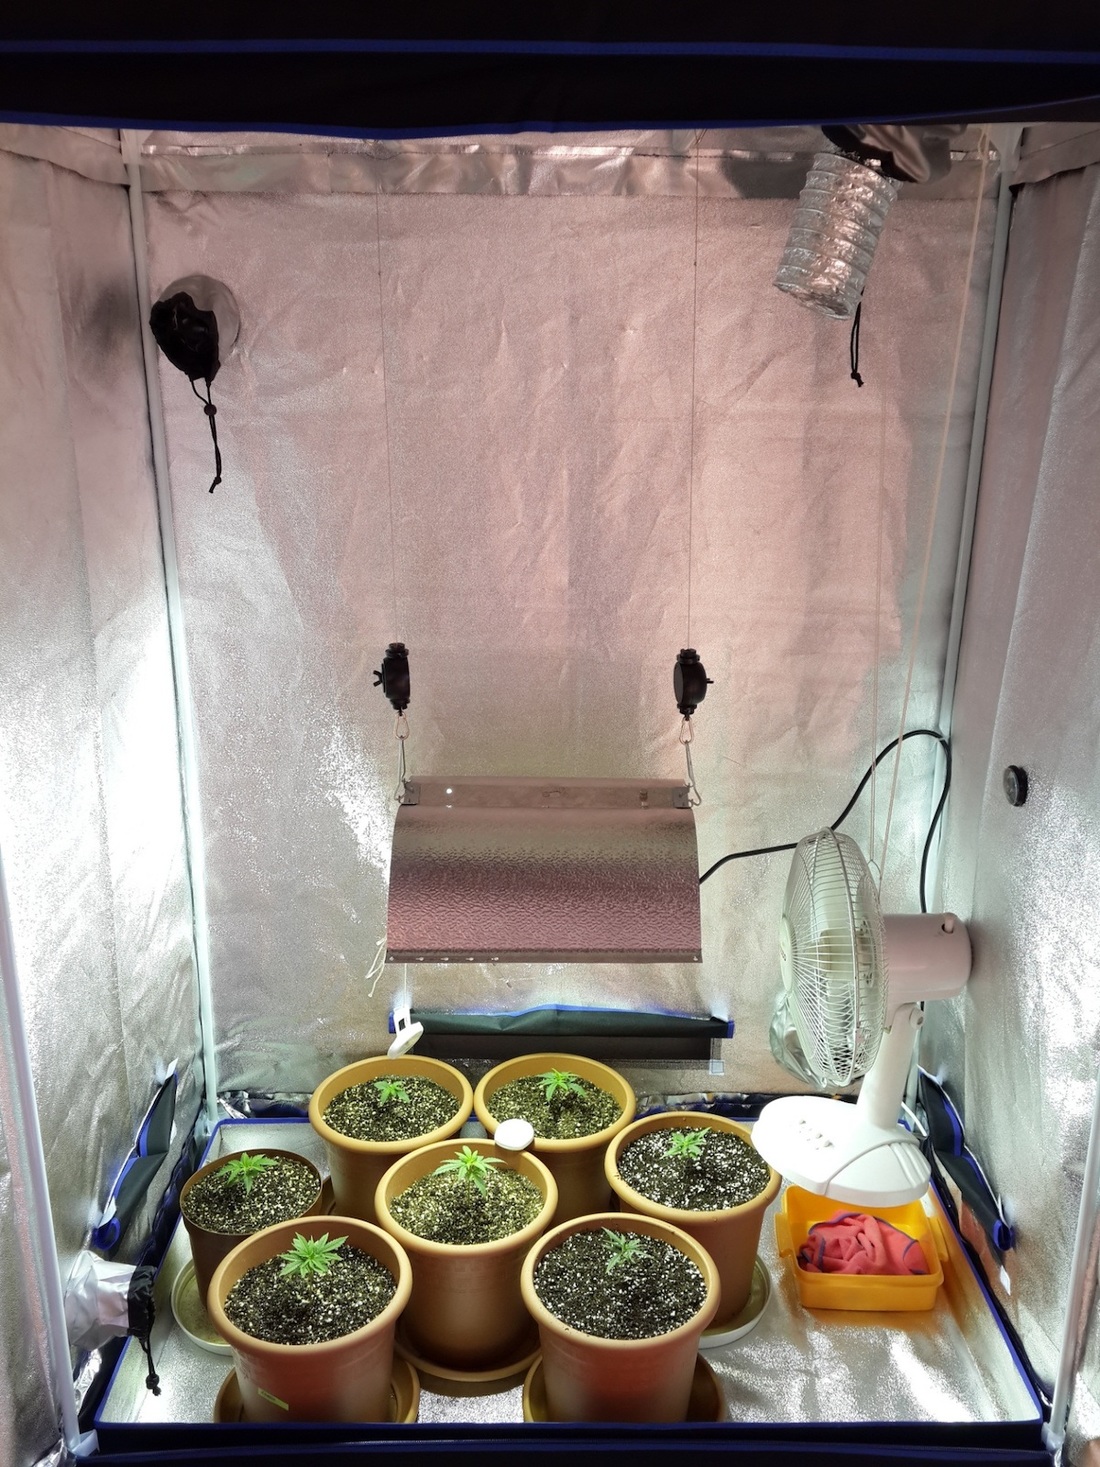
Step 4: Grow!
Now that you’ve got your space all ready, it’s time to roll up your sleeves and get busy. You will be using your 400w light for the growth stage while using the 1,000w light for the bloom stage.
During the veg stage, (400w) you will run the lights 18 hrs on, and 6 hrs off. When you switch to bloom, (1,000w) you will go to a light cycle of 12 on, 12 off. With indoor growing, the grower is the one that decides when to switch to the bloom cycle (12/12).
Keep in mind, some plants can double in size during bloom, so be sure to consider the size of your grow area, before determining when to switch to bloom.
Feeding/watering your plants:
This brings me to the great Ph debate. As I stated in my list of things you will need, this is entirely up to you. Those who ph their nutrients and water swear by it, and those who don’t, swear that it’s nonsense.
I’m somewhere in between. I do ph, but mostly because that’s the way I learned. However, I have tried the results from both ends of the spectrum, and have found no difference in the final product. Also, any ph meter that is going to provide you with any true accuracy, will cost you around $100. So I will leave this decision entirely up to the grower.
If you do ph, you will want to be somewhere in the range of 6.3-6.8. It’s important to note, that if you’re using reverse osmosis water, then there is no need to ph.
How often do I feed my plants?
I feed my plants about every 3 days. You can give them nutrients every feeding if you like, but I feed them every other time. Only giving them water in between.
When you begin the bloom phase, you will want to use about a tablespoon of molasses per gallon of water, in between your feedings.
It’s also important to spray your plants weekly to prevent any unwanted pests. (I use lost coast plant therapy) Also, be sure to spray your plants right before the lights go out, to prevent burning.
Note: Use Mycorrhiza when transplanting.
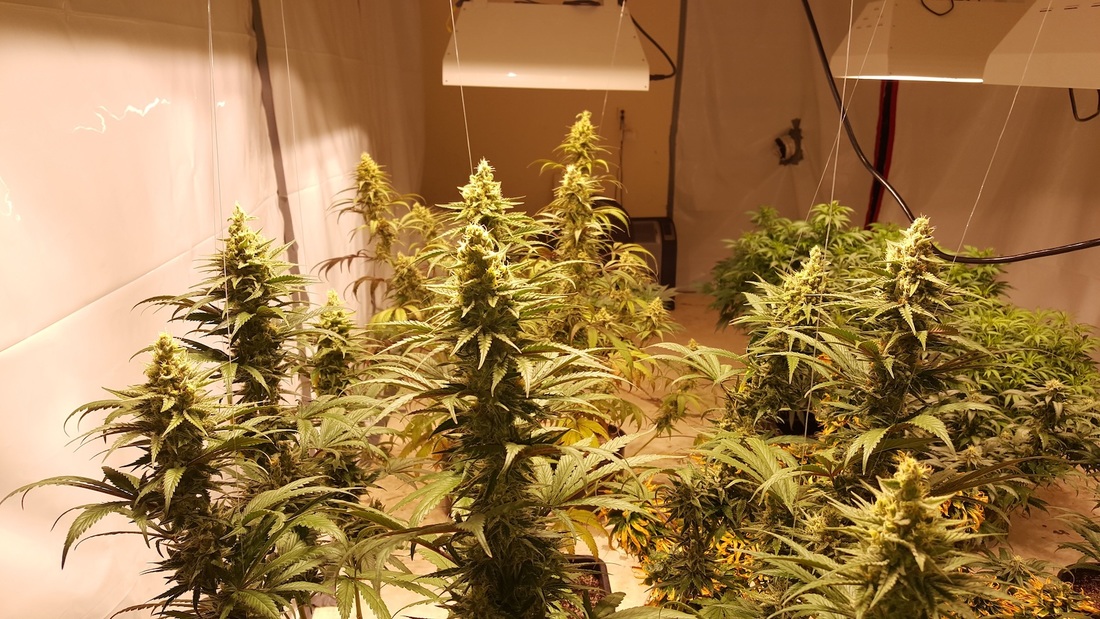
Step 5: Harvest!
Finally, all of your hard work is about to pay off! Patience is key here. Ideas can vary on when the best time to harvest is, but it’s somewhere in between when the trichome heads turn milky white, and amber in color.
Milky white will give you more of an energetic buzz, while the amber will give you more of that classic couch lock high. It’s really a personal preference. I harvest when the heads are around 25% amber.
Note: I flush my plants about 2 weeks before harvest. Flushing is the act of pouring clean water through each plant until it starts to run clear out of the bottom. This is intended to remove salt buildup from the use of nutrients. However, if you’re growing organically, I do not believe this step is necessarily needed.
Step 6: Cure.
When everything has finished drying,(usually 7-10 days) and you’ve trimmed everything up to your liking, it’s time to cure. Curing is easy. You simply place your finished product in air-tight jars and open them for 30 minutes each day for about a month. Simple as that.
Conclusion: Remember, this is simply a guideline to get you started. Once you gain experience and the confidence that comes with it, you can adapt your feeding schedule to fit your own personal preference.
Growing marijuana has its challenges, but it’s something you should enjoy doing, as well as learn from. It shouldn’t be an extra stress in your life, but rather something to relieve it. Good luck, and happy growing everyone!
-Chris
This article is intended for those who live in states where marijuana has been made legal to cultivate.


